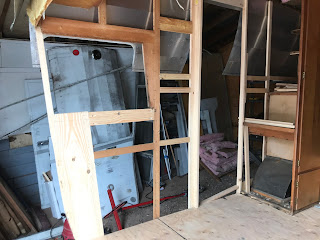
So, the front floor is in and looks good. Now, time to get to work on the rotted framing.
First up- the curbside front walls.
The bottom board that all of the vertical frame boards sit on is called the sill board.
On this side- it was shot. So that had to come out.
A number of vertical boards (uprights) had to be replaced as well-
as they were either rotted or cracked.
as they were either rotted or cracked.
and the closet paneling and outside framing.
I used a reciprocating saw to remove most of the old wood.
It cuts right through the wood and the old nails and screws holding it together.
Power baby ! ha ha
I measured each piece of wood as I removed it, and cut new wood in my brother Tom's shop
BTW- He has been great helping me out with this project when I have a question. I try not to bug him too much- but he is great with showing me how to use certain tools, how best to do certain tasks, and where to get supplies. He even found me birch paneling- which is hard to find in 1/8th".
Thanks brother!!
To attach the new wood- I first borrowed and then bought my own cool new tool:
The pocket hole Jig
Using a drill, it makes 'pockets' into the new wood that allow
the screw to enter the old wood and hold it securely.
It works great for the job I am doing.
And...here are some of the new boards in place:
New uprights:
The very front of my camper is curved-
which means the framing needs to be curved as well.
Uh oh- tough cut coming.
It is unbelievable how flimsy the old framing was on these old campers.
These few pieces of wood, attached by a few staples, frame out the front.
Flimsy for sure!
Luckily, my buddy Larry has a video about beefing up the front curved framing.
Such a great help :)
First I had to make a cardboard template of the outside metal so I would know the exact cut.
I then had to measure in 3/4" for the curbing that would go on later,
and also for the 1/8" paneling that will eventually be there.
I am getting better at reading my tape measure :)
Then..I had to cut. Slow and steady.
However, it went easier than I thought it would.
A few screws later- and I have a new, sturdier front frame for my Shasta!
Now, on to the other side :)


wowzy!! looking good girlfriend!
ReplyDelete